Home > Apple Music Tips > Export Apple Music Playlist
How to Export Playlists from Apple Music
Are you looking to export your Apple Music playlist for offline listening or transferring it to another device? In this article, we will guide you through the steps to export your Apple Music playlist using NoteCable, a reliable and efficient Apple Music playlist downloader. With NoteCable, you can easily save your favorite Apple Music playlists as local files, allowing you to enjoy them even when you're offline or on a different device. So let's dive in and learn how to export your Apple Music playlist hassle-free with NoteCable.

Apple Music Playlist Downloader - NoteCable
It is quite simple if you go with the correct tool. And NoteCable Atunes Music Converter has been proven the top priority if you want to flawlessly download Apple Music, Apple podcast, Apple Music playlist with ease. This is a reliable streaming music converter, whose ability is to convert Apple Music to the normal yet high-compatible audio formats, such as MP3, AAC, WAV, FLAC, ALAC, AIFF. If you plan to switch to another player, you are right with NoteCable Atunes Music Converter. All Apple Music downloads are originally exported and independently saved to the computer for multiple purposes of use. Therefore, you can transfer the songs to other devices and enjoy Apple Music free of a burden even you cancel your Apple Music subscription one day in the future.
 If you need a solution for converting songs, albums or playlists from any streaming platforms (such as Spotify, Apple Music, Tidal, Amazon Music, Deezer, YouTube, YouTube Music, SoundCloud, DailyMotion, and more) to MP3 format, All-In-One Music Converter is the perfect choice.
Steps to Export Apple Music Playlist with NoteCable
Step 1: Download and install NoteCable Apple Music Converter latest verion. Run it on your computer.
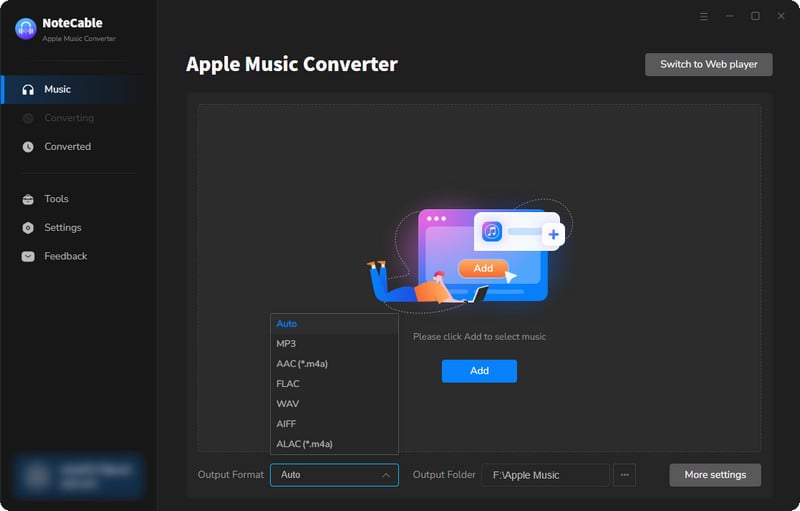
Step 2:Go to Settings, and set the parameter as your preference.

Step 3Simply click the blue Add button on the main interface to add songs from Apple Music to NoteCable.
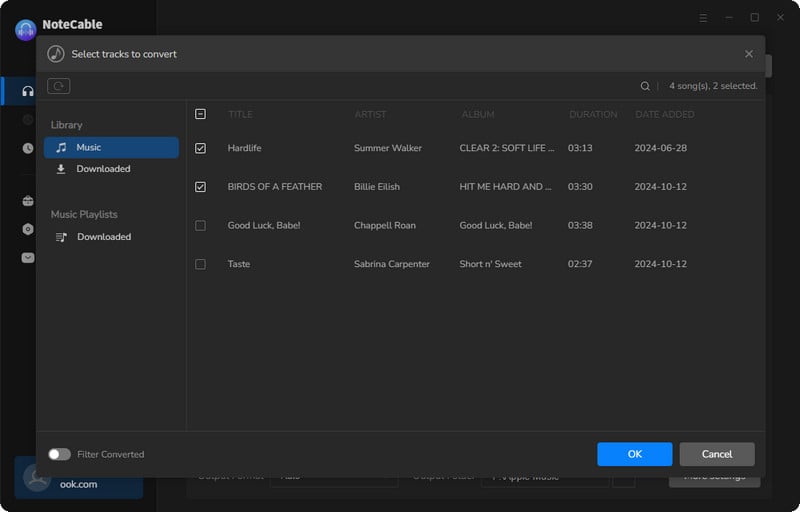
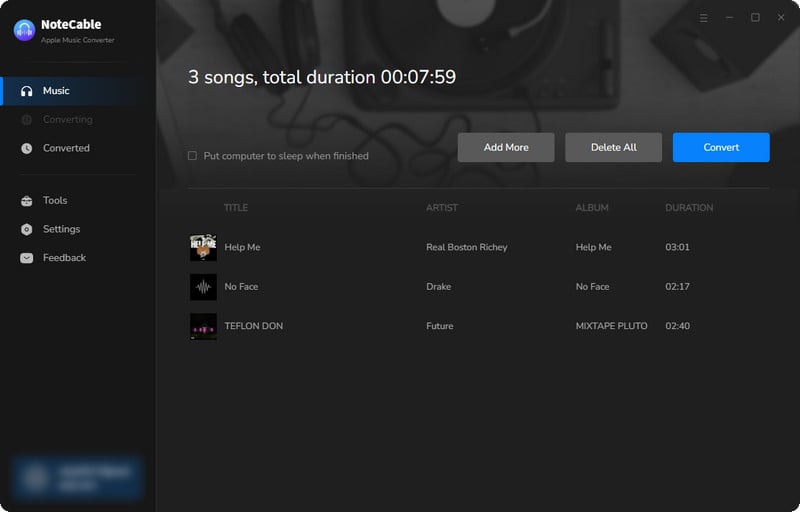
Step 4After completing the song selection, click the Convert button and the download will begin.
This process may take some time, please be patient.
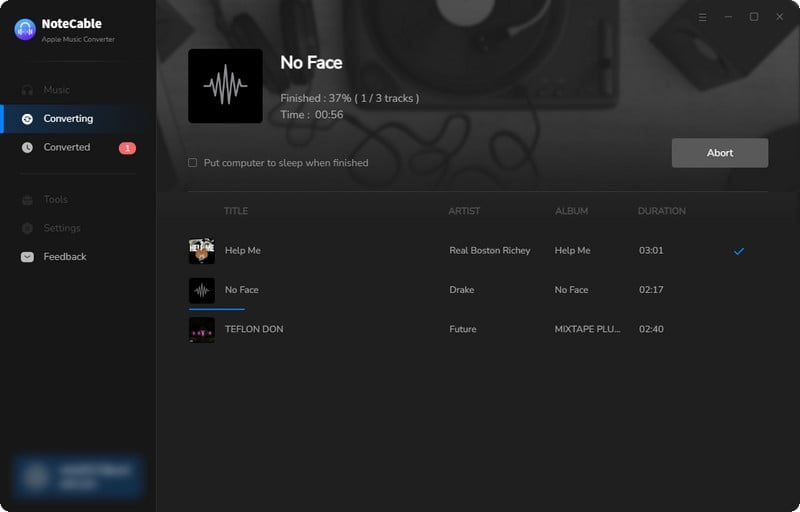
Step 5Once all is done, you can view the downloaded songs in the "History". If you want to find the specific location, just hit the folder icon on the right side of the title.
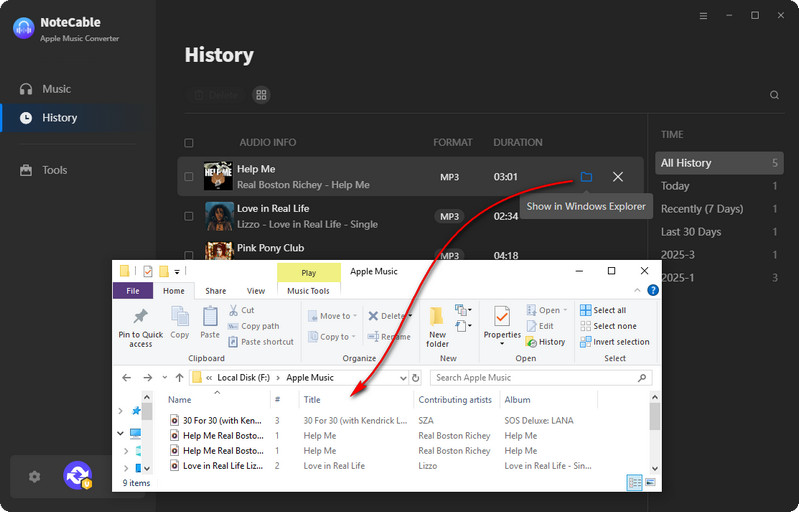
After completing the above simple steps, you will successfully export the Apple Music playlist.
Summary
In conclusion, exporting your Apple Music playlist has never been easier with the help of NoteCable. By following these steps, you can effortlessly transfer your favorite playlists from Apple Music to other devices or enjoy them offline. Whether you're organizing your music library or sharing playlists with friends, NoteCable provides a convenient solution for exporting Apple Music playlists hassle-free. So go ahead and give it a try to unlock a whole new level of flexibility and convenience with your Apple Music experience.


