Home > Apple Music Tips > Cancel Apple Music Subscription
How to Cancel Apple Music Subscription on Windows, Mac, Android and iPhone
In 2023, Apple Music surpassed 88 million subscribers, becoming the second most popular music streaming platform. Despite this, many subscribers struggle to cancel their subscriptions, leading to financial burdens. However, canceling an Apple Music subscription is a straightforward process, whether on an iPhone, Android, Mac, or Windows. This user-friendly method allows individuals to easily switch to a different streaming service or discontinue their subscription, providing flexibility and ease of use. Now, let's learn some details!
- Part 1: How to Cancel Apple Music Subscription on Android?
- Part 2: How to Cancel Apple Music Subscription on iPhone/iPad (iOS)?
- Part 3: How to Cancel Apple Music Subscription on a Windows PC?
- Part 4: How to Cancel Apple Music Subscription on Mac?
- Part 5: How to Cancel Apple Music Subscription without Losing the Apple Music Downloads?
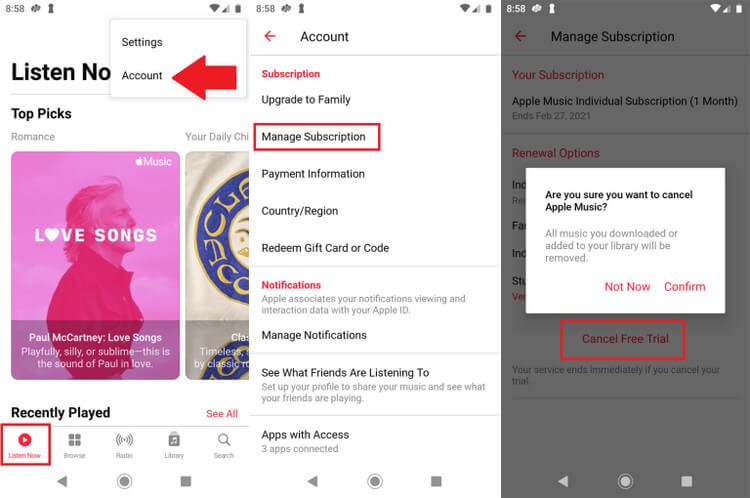
Part 1: How to Cancel Apple Music Subscription on Android?
Step 1: Open the Apple Music app on your Android.
Step 2: From the top right corner of the page, tap the three-dot menu and select Account.
Step 3: Find the Subscription section. From there, tap Manage Subscription.
Step 4: Tap Cancel Subscription.
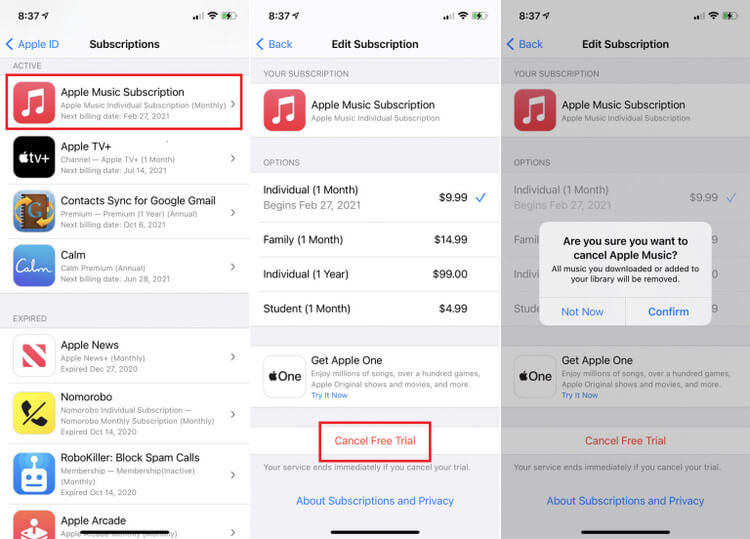
Part 2: How to Cancel Apple Music Subscription on iPhone/iPad (iOS)?
Step 1: Navigate to Settings app.
Step 2: Tap your Name and then tap Subscriptions.
Step 3: You’ll see a list of all your subscriptions
Step 4: Press Cancel Subscription toward the bottom.
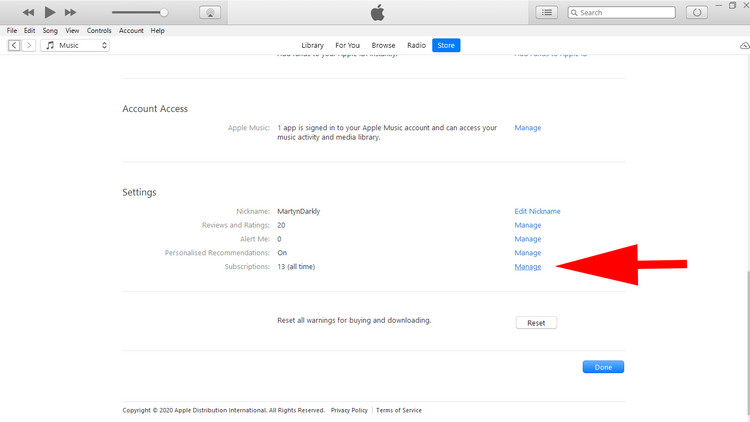
Part 3: How to Cancel Apple Music Subscription on a Windows PC?
Step 1: Open iTunes on your Windows PC.
Step 2: Go to the menu bar at the top of the screen and select Account.
Step 3: Then, press View My Account and scroll down to the bottom of the page to find the Settings
Step 4: Click the Manage option next to the subscription title, then select the Edit option next to Apple Music, and finally click Cancel Subscription and you're done
Part 4: How to Cancel Apple Music Subscription on Mac?
Step 1: Open the App Store App on your Mac.
Step 2: Click Your Name in the bottom left corner of the screen. If you can't find your name, click Sign In.
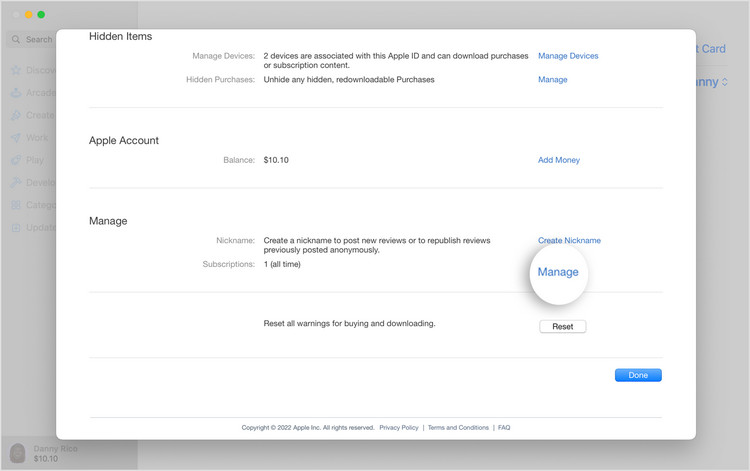
Step 3: Click Account Settings and scroll down until you find the section marked Manage, you’ll see Subscriptions here.
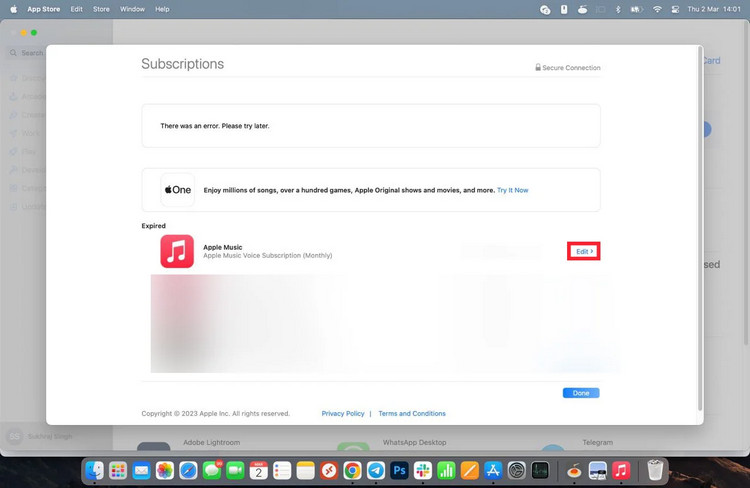
Step 4: Click Edit next to your Apple Music subscription, then click Cancel Subscription and all done.
Part 5: How to Cancel Apple Music Subscription without Losing the Apple Music Downloads?
It’s no secret that Apple Music subscribers love the functionality of a paid subscription. However, when your subscription expires, you will no longer have these features, and your downloaded songs will disappear since they were downloaded as limited buffered files. You can never own any song files.
If you use NoteCable Atunes Music Converter, you can permanently save Apple Music for offline listening, even if you cancel your Apple Music subscription. NoteCable Atunes Music Converter is designed for recording tracks from Apple Music and converting them to common formats for offline playback. Once you download the song as a plain-format file, you can play it through any MP3 player, such as an iPad, iPhone, Android phone or Android tablet.
NoteCable Atunes Music Converter
 If you need a solution for converting songs, albums or playlists from any streaming platforms (such as Spotify, Apple Music, Tidal, Amazon Music, Deezer, YouTube, YouTube Music, SoundCloud, DailyMotion, and more) to MP3 format, All-In-One Music Converter is the perfect choice.
Tutorial: Cancel Apple Music Subscription without Losing the Apple Music Downloads
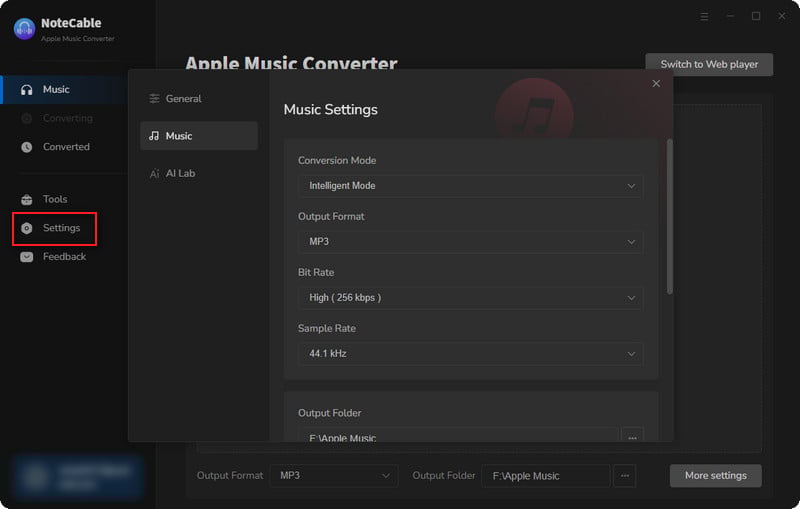
Step 2:Go to Settings, and set the parameter as your preference.
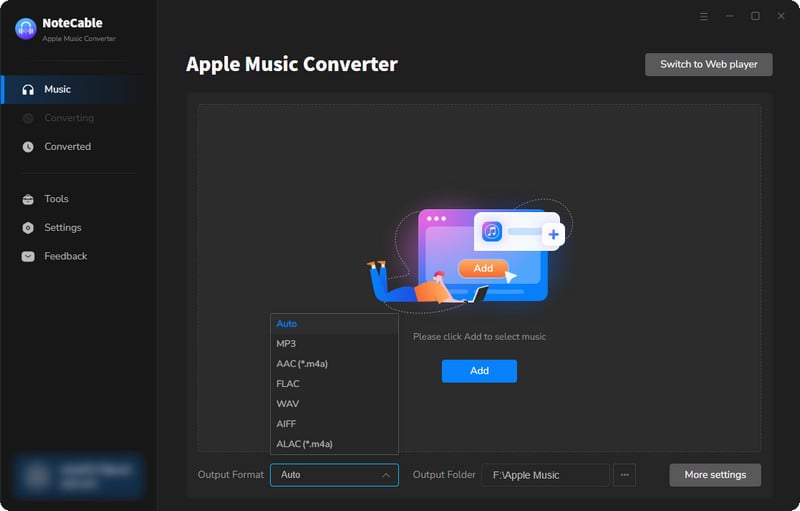
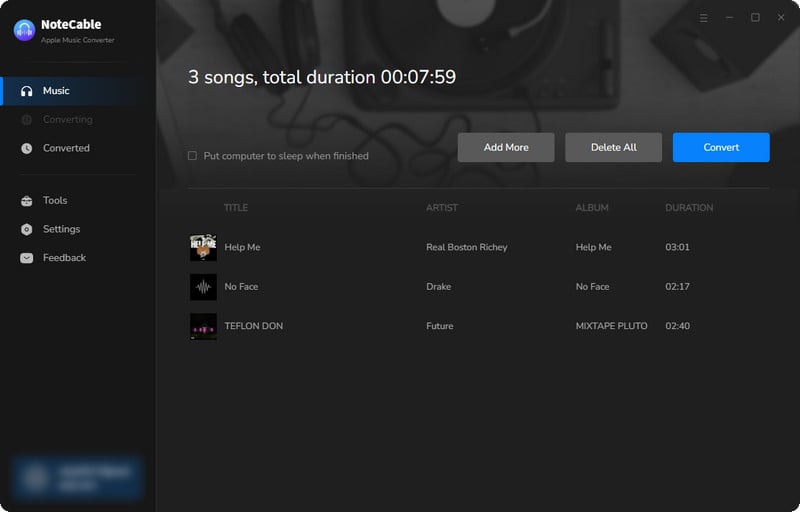
Step 3Simply click the blue Add button on the main interface to add songs from Apple Music to NoteCable.

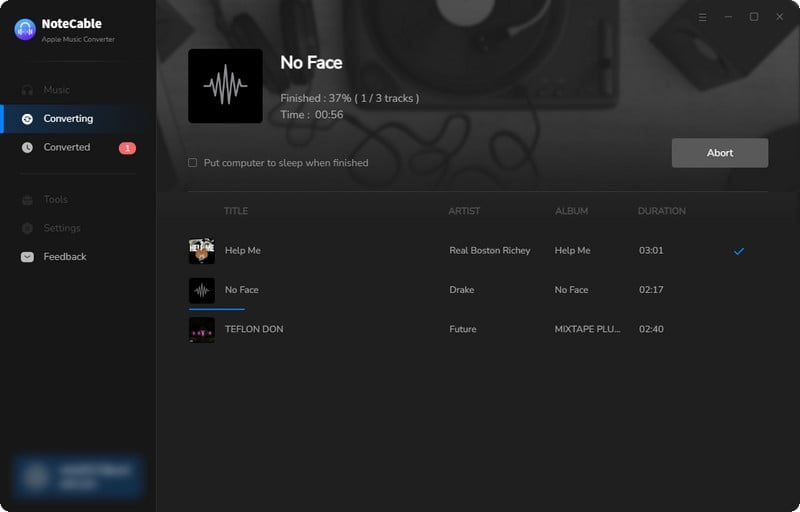
Step 4After completing the song selection, click the Convert button and the download will begin.
This process may take some time, please be patient.
Step 5Once all is done, you can view the downloaded songs in the "History". If you want to find the specific location, just hit the folder icon on the right side of the title.
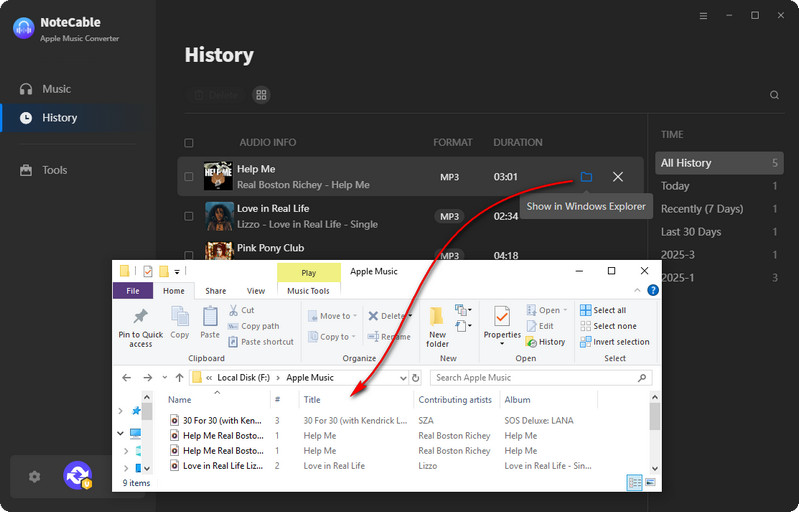
Now that the Apple Music files have been successfully saved to your computer, you can keep them permanently even if you unsubscribe.
Conclusion
No matter what device you use, the process of canceling your Apple Music subscription is simple. Just follow the steps above and you can easily end your subscription. If you need further assistance, you can visit the official Apple support page for more information. Besides, if you want to play Apple Music offline after canceling your subscription, you can ask NoteCable for help. Let’s try it!