Home > Spotify Music Tips > Transfer Spotify Playlist to Another Account
How to Transfer Spotify Playlist to Another Account
“I created a new account. Can I transfer my playlists, saved music and followers?”
For multiple reasons, you may create a new Spotify account to continue streaming your favorite songs. No matter what reason it is, it becomes a problem that you don’t know how to move your previous playlists to your new account. So, in this article, we are going to discuss four methods for you to get this done.
Method 1: By Directly Dragging and Dropping Spotify Playlists
The most direct way to transfer your Spotify playlists to another account is to simply drag and drop the playlists between these two accounts. It is easy to do this with your computer. Following the steps below, you can finish the process:
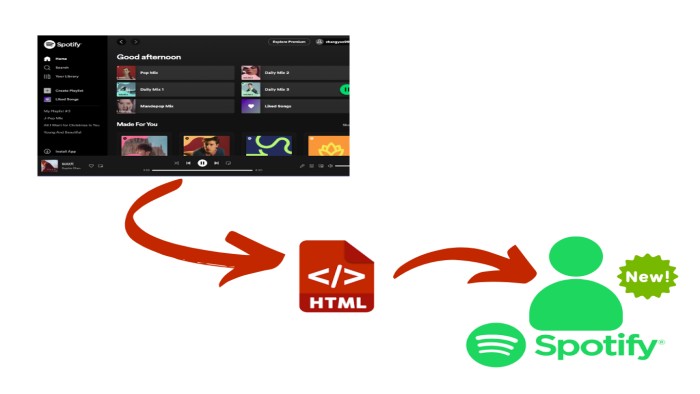
Step 1: Open your Spotify application on your computer or Macbook, and then log into your old account.
Step 2: Select one of your Spotify playlists, drop it to the desktop, and then you will get an HTML file.
Step 3: Double-click the HTML file and you will go to a web page that includes the selected playlist.
Step 4: Log out your old account and log into the new one.
Step 5: Finally, directly copy the playlist to the new account by dragging and dropping again.
Method 2: By Searching for Old Account Profile
If you have some public playlists that are open to everyone, then you can easily search your old account, and follow your profile to save your previous playlists. Follow the steps:
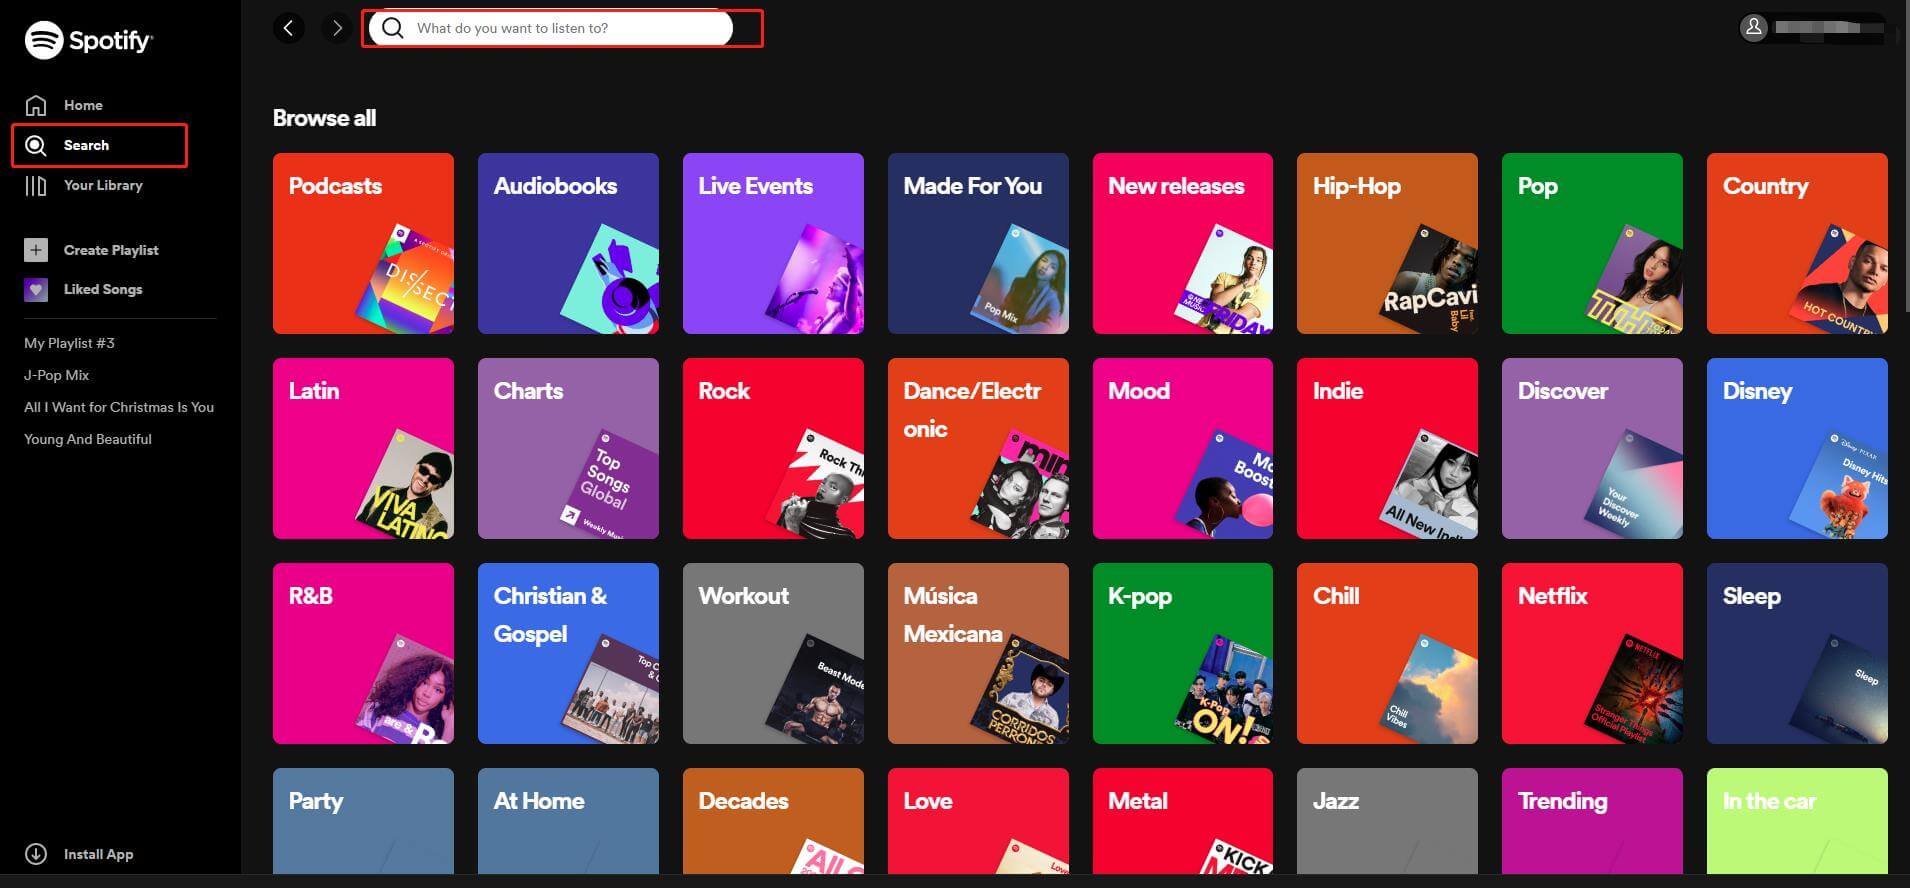
Step 1: Log into your new account, click “Search” and directly search your original account profile.
Step 2: Click on your original account profile, and then locate the public playlists.
Step 3: Right-click your selected one and save it to your new Spotify Library.
Method 3: By Sharing Spotify playlists with Another Account
Another way to transfer your Spotify playlists to a new account is to manually share your playlists from your original account with the new one. However, it may cost a lot of time, because you can only transfer your playlist one by one. See how it works:
Step 1: Open Spotify on your PC or Macbook, and log into your old account.
Step 2: Select one playlist and right-click on it, click “Collaboration Playlist”, and then you can freely view and change the playlist by your new account.
Step 3: Right-click on the playlist again, and click “Share > Copy Spotify URL” to proceed. If you want to transfer multiple playlists, you can just repeat the process and paste the links to a word document.
Step 4: Log out your original account and log into the new one, and then paste the playlist URL that you copy from the original account into the search bar.
Step 5: The playlist will appear on your screen and you can save it to your new Spotify Music Library.
Method 4: By Downloading Spotify Playlist to Transfer
Above we mentioned three methods to transfer your Spotify playlists to another account. It is easy and convenient to finish the task. However, if you want to transfer and save all your playlists on all accounts forever, an efficient way for you is to download Spotify Playlists as MP3, ALAC, AAC format, and so on to transfer among your account or even any of your devices.
To download Spotify playlists, a third-party workaround is required, because Spotify doesn’t allow users to directly download their songs. Here we strongly recommend NoteCable Spotify Music Converter.
NoteCable Spotify Music Converter is specially designed for downloading single Spotify tracks, playlists, whole albums and podcasts to the local computer. It allows you to download Spotify songs as plain music format, including MP3, AAC, FLAC, WAV, AIFF, ALAC. Then you can free enjoy Spotify songs on mobile phones, MP3 players, DJ softwares, cars or any compatible device.
The Tool You Need:
 If you need a solution for converting songs, albums or playlists from any streaming platforms (such as Spotify, Apple Music, Tidal, Amazon Music, Deezer, YouTube, YouTube Music, SoundCloud, DailyMotion, and more) to MP3 format, All-In-One Music Converter is the perfect choice.
It is designed to download and convert Spotify music to six popular formats, including MP3, AAC, WAV, FLAC, AIFF and ALAC losslessly. Besides, it can also preserve the original audio quality and ID3 tags for Spotify songs. Last but not least, NoteCable has an easy-to-use and clear interface, so you will have no trouble learning how to use it.
Step-by-step Tutorial: How to Download Spotify Songs as MP3 files with NoteCable
Step 1Install and run NoteCable on your computer.
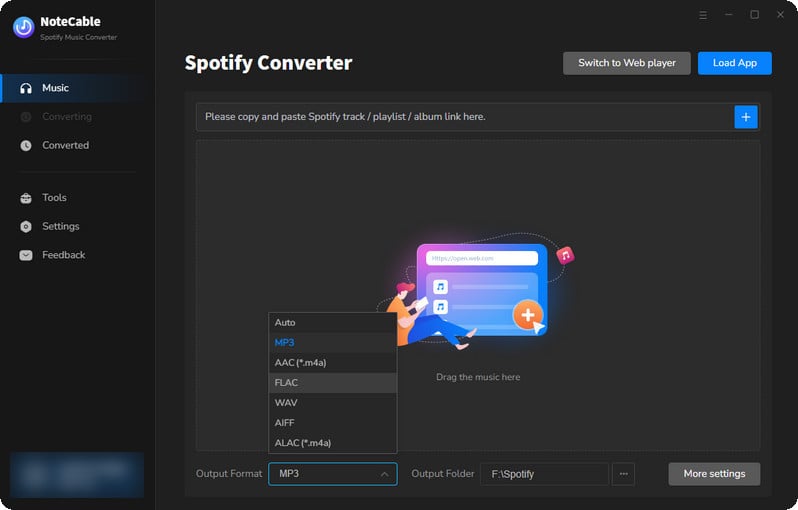
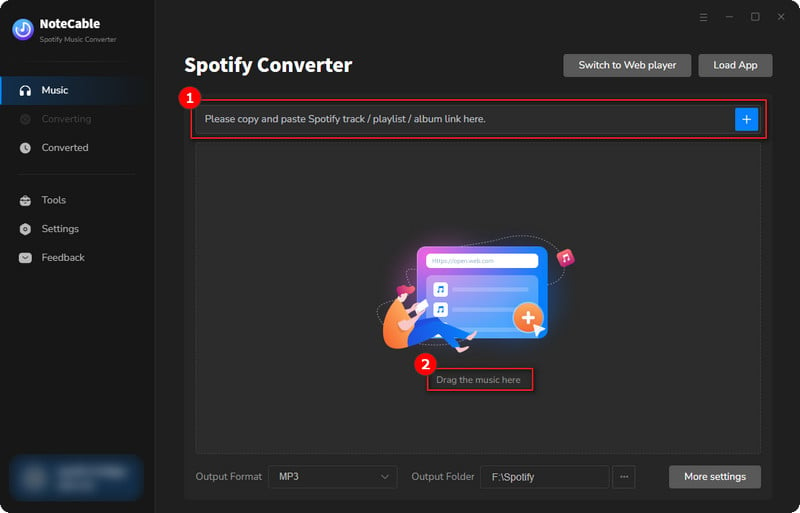
Step 2Import songs into NoteCable to parse.
Method 1: Copy and paste the link of track/playlist/album to the designated column.
Method 2: Drag the track/playlist/album to the mainface.
Step 3Navigate to "Settings" where you can customize the output parameter to your needs, such as Output Format, Bit Rate, Sample Rate, Storage Location, etc.

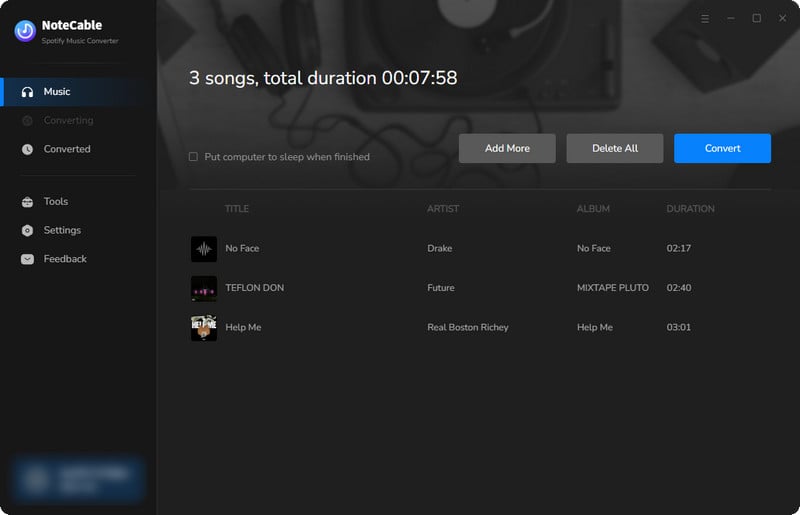
Step 4Once you've completed the above steps, simply click the "Convert" button and NoteCable will start downloading songs from Spotify as your settings.
To ensure smooth downloading, please do not switch to other programs during the process.
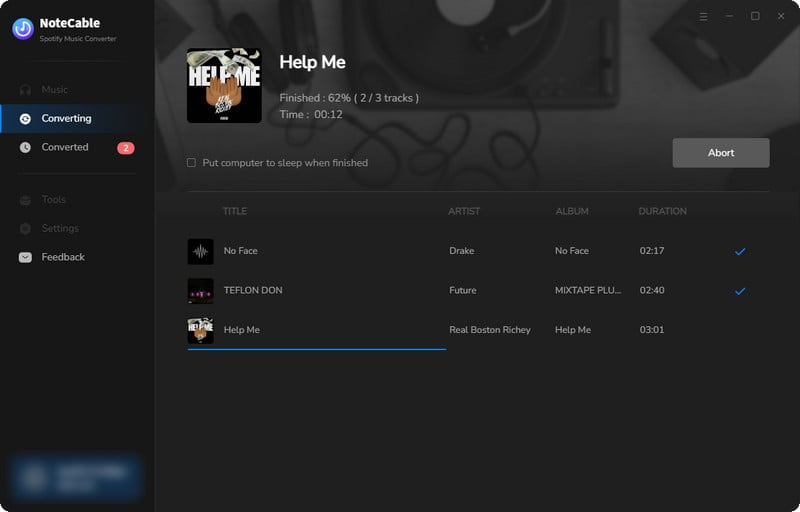
Step 5Once the download is done, click the History tab and you’ll find the Spotify downloads on your local drive.
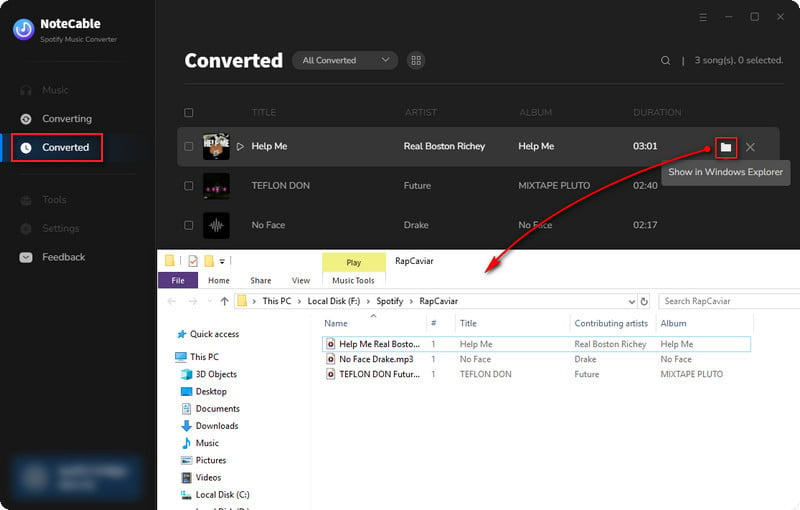
Since your Spotify songs have been downloaded as local music files on your computer, now you can import them to your new Spotify account freely.
Tips: How to Import Local Music to Spotify
Step 1: Just Launch your Spotify and go to Preferences first. (Windows users can find it under Edit, while Mac users can find it under Spotify.)
Step 2: Click Preferences > Local Files > ADD A SOURCE.
Step 3: With the folder added, any unrestricted music contained within will be immediately imported into the Spotify library. Now, you can click Your Library > Local Files.
Step 4: Create a new playlist, click New Playlist in the bottom left-hand corner and name it.
Step 5: Once the playlist is ready, jump back over to the Local Files tab, and add the song you want synced to the playlist. Now, you can freely enjoy your Spotify playlists downloded from an old account.
Summary
In conclusion, we introduce four ways for users to transfer Spotify playlists to another account. Each method has its own attractive points for users to choose from, such as efficiency, convenience and speed. No matter you want to transfer your Spotify playlists to another account or transfer them to your other devices, the best choice for you is NoteCable Spotify Music Converter. With NoteCable Spotify Music Converter, you can freely enjoy offline Spotify songs even if you are a Spotify Free user without advertisements. In addition, you can enjoy a fast speed to download your Spotify songs with high audio quality and save them permanently.


